During Water Week, you will meet a lot of animals that can be found in ponds, rivers, and seas. So, why not make an aquarium for them? Don’t worry- the animals are made out of paper, and so don’t need feeding. Follow this step-by-step guide to complete this fun activity. And see our other water-related content to learn about these habitats!
Adult supervision required- use of scissors throughout.
You will need:
- A cardboard box (preferably with a lid)
- Sewing thread or string
- Scissors or a craft knife
- 2 plastic wallets (either clear or blue)
- Glue
- A ruler
- Paper
- A pencil
- Acrylic paints or coloured card (optional)
- Cocktail sticks (optional)
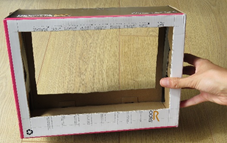
Step 1: Cut a ‘window’ into opposite sides of the cardboard box
Using a pencil and a ruler, mark out where you will cut your windows. You’ll want them to be nice and large, but remember to leave a gap between the window and the edge of the box. Then, carefully cut out your windows.
Step 2 (optional): Decorate the outside of the box with acrylic paints or coloured card
Be as creative as you want! Are you making a stormy sea? A tranquil pond? A busy river? It’s entirely up to you! You can also decorate the inside of the box, to make it look like an idea habitat for underwater wildlife.
Step 3: Cut some holes in the top of the box, to attach the thread later
Think about how many animals you want in your aquarium- cut a hole for each one! The holes just need to be big enough to get the end of a thread through. You can always enlarge them later.
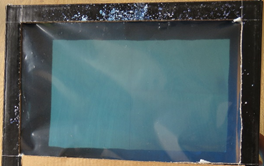
Step 4: Cover the ‘windows’ with a sheet of plastic
Split your plastic wallet into two sheets (one side of a plastic wallet to one side of the box) and cut it so the sheet fits inside your window. Glue this into place. Do this for both windows.
You can use clear plastic for the front window, and blue plastic for the back window, to make your aquarium look even more ‘underwater’!
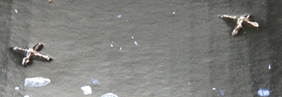
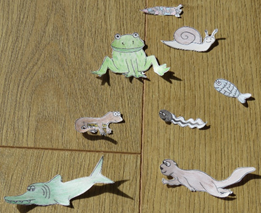
Step 5: Draw some inhabitants for your aquarium
Have you made a pond filled with frogs? Or a sea awash with fish and dolphins? What about a river with playful otters and dragonfly larvae? Look at the habitats covered during Wild Ideas Water Week for inspiration!
Once you have drawn your wildlife, carefully cut them out with a pair of scissors.
Step 6: Attach the thread to your aquarium inhabitants
Use a little bit of glue to attach lengths of thread to the back of the pictures. Wait until the glue has dried before moving on to step 7.
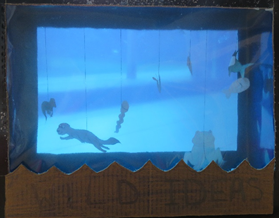
Step 7: Put your drawings in the aquarium
There are two ways you can do this:
Method 1: Wrap the end of the thread around a cocktail stick, and push the stick up through the incision you made at the top of the cardboard box. Repeat for all pictures. You can adjust the height at which each picture hangs in the aquarium, by winding more or less of the thread around the stick.
Method 2: Push the threads through the incisions made in the top of the cardboard box. Use a little bit of glue to hold them in place.

Congratulations on completing your aquarium! Put your creation in a well-lit area and enjoy!
For extra instructions, watch the video below to see how the craft goes together!